Remote-Control Blinds Setup Made Easy: What You Need to Know
There’s something really satisfying about pressing a button and seeing all your blinds open together. It feels a little fancy, as if you’re staying in a nice hotel or living in a smart home from the future. But the best part? You can have that same feeling in your own home today with remote-control blinds setup.
Remote-control blinds aren’t just for rich or high-tech homes anymore. They’ve become much more affordable and super easy to use. Many people still think the setup is hard or needs a pro, but that’s not true anymore.
Today’s remote blinds are made for regular homeowners. You don’t need special tools or tech knowledge. Most come with simple instructions, and you can do it all by yourself.
If you want your home to feel modern, clean, and more comfortable, this is one of the easiest upgrades you can make. And yes, it’s as fun and helpful as it sounds.
Why Upgrade to Motorized Blinds?
Before we open the toolbox, it is helpful to understand why this upgrade is worth the effort. While the “cool factor” is a major selling point, the practical benefits often outweigh the aesthetic ones.
If you have kids or pets, you know how dangerous those hanging blind cords can be. Motorized blinds take away that worry. There are no loose strings, just a clean, safe, cordless look. It gives parents real peace of mind.
They also help save energy. During hot summer days, you can set them to close when the sun is strongest. In winter, you can open them to let warm sunlight in. This helps keep your home cooler or warmer without touching the thermostat and can lower your energy bills.
Got tall windows or hard-to-reach spots like skylights? Motorized remote-control blinds are perfect for those. You don’t have to climb on a chair or struggle anymore. Just press a button and they move like magic.
Safe, smart, and simple motorized blinds are a great choice for every modern home.
Choosing Your Power Source
A successful remote-control blinds setup begins before you even buy the product. You need to decide how your blinds will be powered. This decision dictates how difficult the installation will be.
Battery Wand (Reloadable)
This is the most common option for DIY retrofits. A tube filled with standard AA or lithium batteries connects to the motor. It is easy to install and requires no wiring. The downside is that you will need to replace the batteries every year or two, depending on usage.
Rechargeable Motor
Many modern shades or remote-control blinds come with a built-in lithium-ion battery. You simply plug a charging cable into the motor port (similar to charging a phone) once every few months. This is clean, wire-free, and convenient.
Solar Power
A small solar panel is mounted behind the shade against the glass. It trickle-charges the motor throughout the day. This is an excellent “set it and forget it” option for windows that receive direct sunlight.
Hardwired (Low Voltage)
This option connects directly to your home’s electrical system. While it offers the highest reliability and requires zero maintenance, it typically requires a professional electrician to run wires behind your drywall. This is best done during a renovation or new construction.
The Physical Installation
Once you have your shades and your tools all set, a physical installation is quite similar to hanging traditional blinds. You will generally need a drill, a ¼-inch drill bit, a screwdriver, a steel measuring tape, a level, and a pencil.
1. Measure and Mark
Accuracy is everything. Decide if you are doing an “inside mount” (inside the window frame) or an “outside mount” (on the wall above the frame). Hold your brackets up to the desired location and mark the screw holes with a pencil. Make sure to use your level to ensure the brackets are perfectly aligned; even a slight tilt can cause the fabric to track unevenly later.
2. Install the Brackets
Pre-drill holes at your pencil marks to prevent the wood or drywall from splitting. Screw the brackets firmly into place. If you are mounting into drywall without a stud, ensure you use heavy-duty drywall anchors to support the weight of the motor.
3. Mount the Shade
Insert the headrail of the blind into the brackets. Depending on the brand, this might snap, click, or slide into place. Give it a gentle tug to ensure it is secure.
The Programming Phase
This is the step where everything comes together, connecting the remote so your blinds work at the push of a button. It may sound technical, but it’s actually easier than you think.
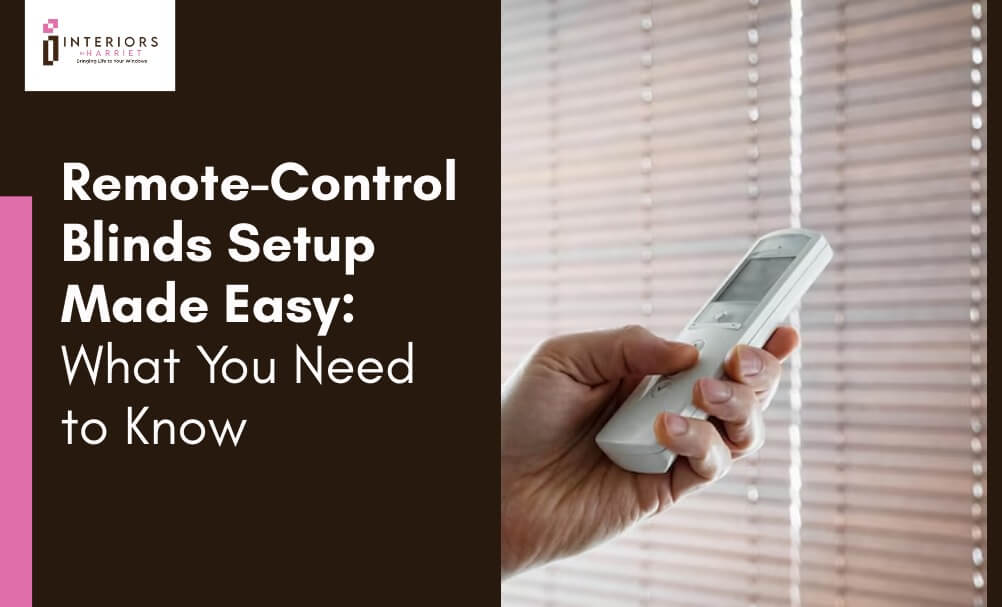
Pairing the Remote
Each blind motor needs to recognize its own remote. If your remote has different channels, choose the one for this blind. Then press the small button on the blind motor until it moves slightly (called a “jog”). That means it’s ready. Now press the pairing button on the remote; another jog confirms it’s connected.
Setting Top and Bottom Limits
Raise your blind to the highest point you want. Save it using the instructions that came with your remote. Then lower it to the bottom position and save that too. This stops the motor from over-rolling the fabric.
Add a Favorite Position
Some remotes let you pick a halfway spot great for letting in just the right light.
Troubleshooting Common Setup Issues
Even the best-laid plans can encounter hiccups. These are a few common issues homeowners face during the remote-control blinds setup and how to fix them.
The blind moves in the wrong direction.
You press “Up,” but the blind goes down. This is a polarity issue. Most remotes have a sequence to reverse the direction. Usually, holding the Up and Down buttons simultaneously for a few seconds will fix this.
The remote won’t pair.
Check the power first. If the motor battery is dead or the remote battery is weak, they cannot communicate. If power is good, you may need to reset the motor to factory settings (usually by holding the motor button for 10-15 seconds) and try again.
The shade tracks unevenly.
If the fabric is telescoping (rolling up crooked), your window frame or brackets might not be level. You can use small pieces of masking tape on the roller tube to shim the low side, balancing the roll.
Taking it to the Next Level: Smart Home Integration
Once your remote is working, you might want to ditch the remote entirely. Many motorized blinds can bridge to smart home systems like Amazon Alexa, Google Home, or Apple HomeKit.
To do this, you will typically need a “Hub” or “Bridge” a small device that plugs into a wall outlet and connects to your Wi-Fi. The Hub talks to your Wi-Fi, and then sends radio signals to your blinds.
Once it gets connected, you may unlock the true potential of automation:
- Voice Control: “Alexa, turn on Movie Mode” can lower the blackout shades instantly.
- Schedules: Have your bedroom shades rise gradually at 7:00 AM to wake you up with natural sunlight.
- Geofencing: Program the blinds to close automatically when you leave the house to save energy.
Elevate Your Home Experience
Installing automated window treatments is one of those upgrades that quickly becomes part of your everyday comfort. Once your remote-control blinds are set up, you’ll wonder how you ever lived without them. Opening and closing your blinds becomes smooth, quiet, and effortless; no cords, no strain, no hassle.
By following the steps in this guide, you can complete a remote-control blinds setup with confidence and without stress. Take your time when measuring, double-check your mounting, and follow the programming steps carefully. A little patience upfront makes a big difference in how well everything works.
The benefits show up right away. You can control light with a button, help manage indoor temperature, protect furniture from sun damage, and enjoy added safety for children and pets. It’s a simple project with a big payoff.
If you’d like expert guidance or want help choosing the right system, consult Harriet J and make your window upgrade even easier.